I have previously written about using a TV remote to send serial messages to a computer.
I’ve played around with this concept for a bit- particularly, translating those serial messages into MIDI data. I put together a little “home-made MIDI controller” prototype (pictured above).
It’s not the prettiest thing (the innards are so hideous that I didn’t take any photos of my shameful wiring), but it was so cheap to make, and so easy to set-up… There’s no reason not to build your own version (and make it better than mine). If you have no coding experience, or no electronics experience, then no worries. I implore you; programming and electronics are not impenetrably complex. Do not get “put off” by the misconception that they are . They can be; but for what we are doing… if you can build an IKEA table… you can build one of these. I promise.
Starting out
The controller is very simple, and although mine is made with soldered wires- I’m going to demonstrate a solder-free version using a breadboard with one button, and one rotary encoder. Now, electricity and circuits and stuff makes my head spin, so we aren’t building any complex logic gates, or worrying about calculating resistances or voltages or whatever. What makes this controller so cheap and easy to make, is that it utilises an inexpensive ($3-5) little single-board computer called a ‘microcontroller’. The particular Microcontroller I’m using, is the Raspberry Pi Pico (RP2040):
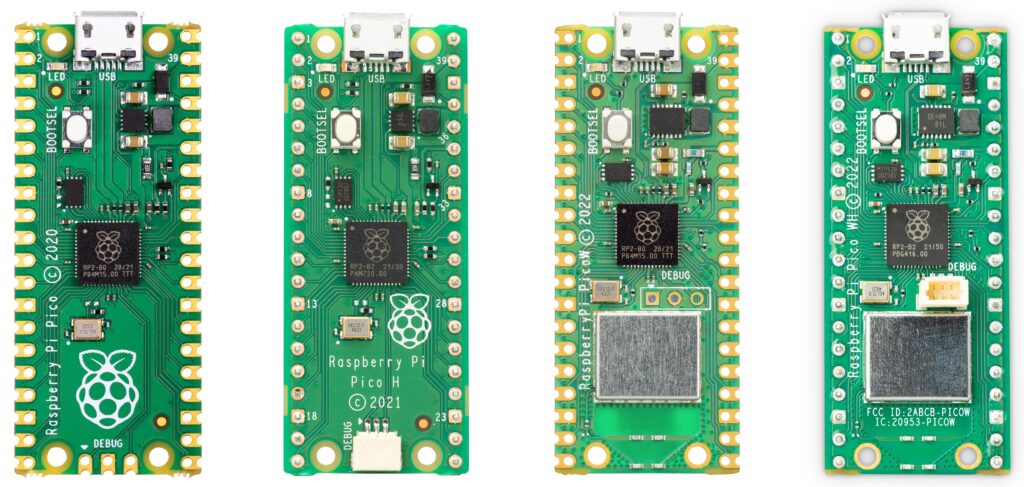
You’ve probably heard of the Raspberry Pi computer before; this ‘Pi Pico’ is like the Raspberry Pi’s baby cousin. It’s the size of a thumb-drive, and boasts a whopping 2MB on-board flash memory. The full-model Raspberry Pi runs an entire operating system; like a wallet-sized PC. By contrast, this Pi Pico is for smaller, ‘simple’ tasks that don’t require a full-blown computer. Like automating your sprinkler system, or making a digital clock. You can see on all the Pi Pico models pictured above- there’s that black square-shaped component with the Raspberry logo printed on it. That’s the RP2040 microcontroller chip; the brains of the operation.
Then there’s 40 little pinouts (20 on each side), for you to wire up whatever components you want. In this case, we’ll be wiring up simple buttons and rotary encoders- but I’ve successfully built similar ‘midi controllers’ that use rangefinders and even flame sensors to input data.
The RP2040 can store and run code. And we can write code that interacts with the board’s pins. So instead of needing to worry about any fancy circuitry, all we need to do is connect the Pi Pico’s pins to our other components, and we can handle more or less everything in ‘software’ on the microcontroller.
Essential Hardware
The controller we are building is totally customisable. Don’t want knobs, but want more buttons? Swap them out! You could easily adapt this to any RP2040-based Microcontroller instead of the Pi Pico. I haven’t tested it on a ESP8266 or ESP32, but I’m sure it’ll probably work on those boards just the same.
- Raspberry Pi Pico (or similar MicroPython-compatible microcontroller)
- You could use a Pico W or Pico H model. I’m using the ‘original’ Pi Pico RP2040 model.
- We’re going to be using a breadboard, so you want to get a Pico with the pin headers already soldered on. You can solder them yourself if you have the tools, there’s about a bajillion YouTube videos that cover how to do it. But this will be written as a solder-free project, so just get one with the pin headers pre-soldered on.
- Breadboard
- Jumper Wires
- Inputs (buttons/knobs/whatever)
- To be specific; for this guide I’m using a KY-040 Rotary Encoder (5 pins)
- And a generic little button component (sometimes called a ‘Tactile Switch’ or ‘Micro Switch’).
- Don’t forget the micro-USB cable you’ll need for the Pico. We’re building a wired-controller; the device is both powered by the USB cable and sends serial data over this same cable to the computer. We could send the serial data over Bluetooth with a board like the ESP32, but then we’d need to figure out some sort of battery/charging system to keep the device powered. Let’s keep it simple with a wired connection.
Where/how to get this stuff?
This is hobbyist electronics stuff. In VIC Australia, the go-to brick-and mortar store would be Jaycar. There’s a hefty mark-up on their stock, and they are getting absolutely slayed on price by online megastores like Ali Express or Amazon. Nice to have a local store you can visit when you’re in a pinch and need something now though.
If you are truly a beginner and don’t have any of this laying around– I very highly recommend buying some sort of ‘bundle’ or ‘starter kit’. It’ll have a breadboard, jumper wires, and probably some resistors, buttons and LEDs so you can start tinkering right away. If you do a webstore search for “Raspberry Pi Pico Starter Kit”, you’ll find tons of kits at different price-points that come with more-and-more fun components to mess about with.
As for the cost of the project; I bought a pack of 200 buttons for ~$10 a while ago; so each button is only worth 5 cents. But it would be unfair for me to list a cost for this project based on the value of the individual components, because you’re not going to be able to go out and pay just 5 cents for a singular button.
If you buy a Raspberry Pi Pico starter kit of some kind, odds are it’ll have all the components I used in this project and more. Buying each component individually, I reckon you can realistically expect (at time of writing) to be paying:
- ~$4 for the Pi Pico (this is the most expensive singular bit)
- ~$3 for a breadboard kit that includes jumper wires
- ~$2 for a whole box of button components
- ~$2ea for a rotary encoder
So ~$10-15 ain’t bad for a custom MIDI controller.
Essential Software
I’m a Windows guy, but everything here is cross-platform compatible (probably) and free. Regardless of if you are building a MIDI controller, or a little robot, or whatever… these are must-haves; to the point where most tutorials of this nature will assume you’ve already got them installed and are familiar with them:
1. Python
Where: https://www.python.org/downloads/
What: Python, the programming language.
Why: Python is an interpreted language, as opposed to a compiled one. The difference is:
With some languages (like C++), you write the code in its human-readable form; then that code needs to be ‘compiled’ into a different, more ‘computery’ language (using a ‘code compiler’).
With Python on the other hand; you don’t need to compile your code. Instead, you install a Python ‘interpreter’ onto your machine, and your human-readable Python code gets ‘interpreted’ to the computer ‘on-the-fly’. So we’ve got to install the Python interpreter before we can execute our own Python scripts.
2. VS Code
Where: https://code.visualstudio.com/
What: This is an incredibly versatile, industry-standard, coding program.
Why: If you’re writing/editing/working with code… you don’t want to be stuck using ‘notepad’ or whatever. You’re going to want the proper tools for the job!
3. Thonny
Where: https://thonny.org/
What: Really simplistic code-editor for Python languages.
Why: Thonny hasn’t got the same fancy feature set that VS code does; in-fact- it’s a little rough around the edges. But the Raspberry Pi people have gone full-send on it, and now it’s the ‘de-facto’ beginner’s tool for working with Python-powered microcontrollers. Most tutorials you find on the internet will probably have you working in Thonny. It’s small, lightweight, and a ‘good-to-have’.
4. Micropython
Where: For the Pi Pico you can get it here. Otherwise: ****https://micropython.org/download/
What: This is a .uf2 file. We’re going to put it onto the Pi Pico microcontroller (see below) to ‘reprogram’ it as a Micropython device.
Why: The tiny microcontroller’s brains can’t handle full-bore proper ‘big-boy’ Python; so they’ve got this ‘MicroPython’ implementation instead. Now Python programmers don’t need to learn a C-based programming language to work with teeny tiny hardware. A special side note to be aware of: there’s a rival to MicroPython called Circuit Python, which is similar enough that you’ll get them mixed up all the time, but different enough that the code is not always cross-compatible. Both have their pros and cons; the anecdotal reason I use MicroPython over the other, is because I also work with ESP8266 boards a-lot; and they don’t support CircuitPython. Be wary when looking up tutorials online, Adafruit (an unavoidable name in hobbyist electronics) mainly support CircuitPython (in fact, they develop it); and thus many of the “beginner’s guides” and projects you’ll find via Google are CircuitPython projects. Always check which Python implementation you are working with.
How it’s going to come together
I’m going to split this up over a few shorter guides that cover each step in detail. Here’s a rough outline of what we’ll be doing:
- We are going to wire everything up to the Pico on our breadboard.
- We’ll flash the Pico with the MicroPython
.u2ffile we’ve downloaded, and have a little play with it using Thonny to familiarise ourselves with how it works. - We’ll put the necessary code for the controller onto the Pi Pico using Thonny, and I’ll show how my code can be easily modified to add different components to your controller.
- On your PC, we’ll write some Python code to interface with the serial data (similar to my IR Remote Post) that gets sent by the Pico when you press a button or turn a knob.
- Finally, I’ve written software that allows you to ‘translate’ these serial messages into MIDI commands. I’ll walk you through how to set that all up, so you can use this thing to control Ableton, Traktor, or your DAW/DJ program of choice.
If you aren’t interested in MIDI, and are satisfied with sending the computer serial data, you can stop after step 3 or 4. Touch Designer (for example) has a Serial DAT which will allow you to more-or less ‘plug-and-play’ with this device. VVVV, similarly, has a SerialPort node. If you know your way around Python, you could adapt my code to handle the serial data in whatever way you want. Perhaps you want it to trigger keystrokes instead of MIDI? Send a callback request to a webserver? Open/close a program on your computer? Whatever- I don’t know. It’s up to you.