To give some context about my own use-case: I have a built a Python application that rotates between different ‘dashboards’; each dashboard displays data that is updated live on the screen (in visually ‘satisfying’ ways- it’s not just a bland ‘table’ of information). The intention is to run this application on a PC that is connected to a TV screen in the office- so up-to-date information is readily visible on the TV at all times.
“But wouldn’t it be cool,”
I thought,
“If I could use the TV remote to switch between different dashboard views…”
Enter Microcontrollers
I have a Flipper Zero, and the IR features were one of the main draws for me when I backed the thing on Kickstarter. I was doing multiple A/V set-ups per-week; so having a ‘universal remote’ in my pocket that could control just about any venue’s TV or projector setup was a real boon. The whole “IR” thing kinda piqued my interest after that- and I have a collection of different IR components I’ve saved from discarded televisions, set-top boxes and other small consumer electronics.
You can knock up something similar to what I’ve done for less than $10 with:
- A Pi Pico (you could easily adapt this for most RP2040 or ESP8266 boards)
- An infrared receiver module (something like a KY-022)
- Jumper-leads/Micro-USB cables etc.
The Pico needs code to:
- Receive the IR data from the receiver module.
- Then send this information to the computer (over the USB connection).
This code will be running in a loop. The words ‘receive’ and ‘send’ imply one action. But really, it is constantly receiving, and constantly sending. Think of it more like listening for user inputs, and streaming updates about those inputs to the computer.
Thonny and Micropython
I grabbed Micropython for the Pi Pico here: https://www.raspberrypi.com/documentation/microcontrollers/micropython.html
Once I install Micropython , the Pico reboots, and I can see it in device manager under ‘Ports’. It’s listed as USB Serial Device (COM4). So it’s using the ‘COM4’ serial port. Noted.
To test out the Pico, let’s open the device’s shell in Thonny.
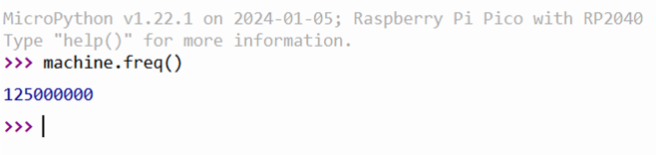
Here I can type Python Micropython code directly into the Pico’s shell. machine.freq() returns a value of 125 MHz – the default clock speed of the Pi Pico’s RP2040. Pico is working with Micropython. Check that off the list.
Wire up the IR receiver
A cupboard at my grandparent’s house had accumulated like 50 spare remote controls over the years. I’ve got a random no-brand TV remote from that collection here to test with; and a little 3-pin IR receiver module (a KY-022 “with the serial number filed off”).
I’ve connected the IR receiver to the Pico as follows:
| Pi Pico | IR Receiver |
|---|---|
| GP2 | S |
| 3v3 | VCC ( + ) |
| GND | GND ( – ) |
When I aim the TV remote at the IR module and press a button, the receiver module’s little onboard LED flashes. This is looking promising! Some remotes are Bluetooth, or use sub-GHz radio frequencies to transmit data; these would not make the LED blink, or be suitable for this project. So we can confirm both the IR receiver and the remote are working.
Code on the Pico
import machine
import time

# replace with your input pin
ir_pin = machine.Pin(2, machine.Pin.IN)

uart = machine.UART(0, 9600)

while True:
    ir_val = ir_pin.value()
    if (ir_val != 1):
        print(ir_val)
        time.sleep(0.1)
This simple Micropython code, when run on the Pico; prints ‘0’ whenever I aim the TV remote at the IR module and press a button. So we know the sensor is working and detecting our remote control. But no matter what button I push on the remote itself… the Pico reads a value of ‘0’ off the pin. I need to further decode the actual IR data (pulses) being sent by the remote; currently- I’m only reading if the pin is being pulled up or down.
Decoding the IR data itself is complicated by the fact that there are a range of different IR protocols floating about out there. Usually you can make an educated guess towards what protocol remote you have, based on the manufacturer. But in my case, I have no idea what this cheap no-name TV remote is using.
Luckily, there’s a library here https://github.com/peterhinch/micropython_ir from a fellow called Peter Hinch that can come in clutch for us. I installed the ir_rx package (manually; you literally git clone the library, then move the ir_rx folder from your computer to the Pi Pico). The script acquire.py has a function called test(). This function reads off Pin 16 by default, so I changed it to 2. Then I went ahead and ran:
from ir_rx.acquire import test
test()
After blasting off some buttons on the remote, the Pico printed the result (edited for length):
060   588
061  1653
062   612
063  1631
064   613
065  1627
066   613

NEC
Huzzah! I now know my TV remote is using the ‘NEC’ protocol. So I modified this code from the documentation into something that would display the unique values of the commands of my remote:
import time
from machine import Pin
from ir_rx.nec import NEC_16  # NEC remote, 16 bit addresses

def callback(data, addr, ctrl):
    if data < 0:  # NEC protocol sends repeat codes.
        print('Repeat code.')
    else:
        print('Data {:02x} Addr {:04x}'.format(data, addr))

ir = NEC_16(Pin(2, Pin.IN), callback)
while True:
    time.sleep_ms(500)
Now when I press the ‘volume down’ and ‘volume up’ buttons on the remote, I get the values 1a for volume down, and 12 for volume up:
Data 1a Addr 9b44
Data 12 Addr 9b44
Great. Now we need to send this data to the PC over serial. Something to be aware of here is that only one application can access the COM4 serial port at a time. So if I have Thonny open to interface with the Pico, I wont be able to access the Pico’s serial port in another application.
With Micropython, the Pi Pico will ‘auto-run’ a script on boot if it is named ‘main.py’ and stored in the Pico’s root directory. So I can finalise this Micropython code and save it as ‘main.py’ on the Pico:
import time
from machine import Pin
from ir_rx.nec import NEC_16  # NEC remote, 16 bit addresses

led = Pin(25, Pin.OUT)

def callback(data, addr, ctrl):
    if data < 0:  # NEC protocol sends repeat codes.
        print('IR_REPEAT'.format(data))
        if(led.value() < 1):
            led.toggle()
    else:
        print('IR_{:02x}'.format(data))
        if(led.value() < 1):
            led.toggle()

ir = NEC_16(Pin(2, Pin.IN), callback) # On pin GP2

while True:
    if(led.value() == 1):
        led.toggle()
    time.sleep_ms(500)
I added some control over the Pico’s onboard led, and formatted the data so that is has the prefix “IR_” added to it. This will help distinguish it from other data that may find its way into the serial buffer in future (if I add more sensors/buttons/etc).
Now I make sure to close Thonny, un-plug and plug-back in my Pico’s USB cable from the computer, and boom- I can open VS code and start scripting in ‘real’ Python, on the PC. Something to listen to the Pico via serial.
The Code on the PC
This quick ‘n dirty little ditty will get us reading the Pico’s messages:
import serial

ser = None # serial port object

try:
    ser = serial.Serial('COM4', 9600)  # serial port
except serial.SerialException as e:
    print(e)
    print("No Pico found")

while True:
    if ser:
        if ser.inWaiting():
            picoMessage = ser.readline().decode('utf-8').strip()
            print(picoMessage )
Here’s the output I get when I run this and press some buttons on the remote:
IR_01
IR_18
IR_0c
IR_REPEAT
Great! The lynchpin of this script is the ser.inWaiting()function call; which checks if there are any incoming bytes in the serial buffer. If there are, it proceeds to decode the information as a utf-8 encoded string: picoMessage = ser.readline().decode('utf-8').strip(). This get stored in a variable I’ve named picoMessage, which gets printed to the screen.
I can use this to generate a table of the commands each button on the remote sends. First, I make a list of all the buttons on the remote:
b_list = [
    "power",
    "mute",
    "1"
		# ... and so on
]
Define these variables:
index = 0
ledger = {}
Then run this as the main loop:
while True:
    if ser:
        if ser.inWaiting():
            picoMessage = ser.readline().decode('utf-8').strip()
            if(picoMessage != "IR_REPEAT"):
                ledger[b_list[index]] = picoMessage
                print(b_list[index], picoMessage)
                index += 1
                if index >= len(b_list):
                    # write to file
                    with open('ir_ledger.py', 'w') as f:
                        f.write(str(ledger))
                    exit()
                print("Now press", b_list[index])
Press the buttons on the remote as prompted, and when you reach the end, the code will save a file named ir_ledger.py, with all the keys and their respective commands stored as a dictionary:
We’ve done it!
We have a method of receiving discreet commands from a TV remote, and passing them to a Python script running on a PC.
The Pi Pico has many more GPIO pins to take advantage of. I could attach a range of different sensors/tactile inputs to it, and build a truly unique interface for my PC. By bringing the commands into a Python process on the main machine; more or less anything can be controlled on the computer with a standard TV remote.