Most people use PowerShell in two ways:
- Typing commands directly into the terminal window, one line at a time. This is super handy for making quick configuration changes, or performing tasks on the computer which might otherwise take a-lot of time if done via the GUI.
- For tasks of a repetitive nature, people will write ‘scripts’. These are a pre-written set of instructions saved as a file that you can call upon as needed. So instead of writing the same set of commands into the terminal over-and-over, you just write them down once in a script, and tell the computer to read the script every time you want it to ‘do the thing’.
While learning, it is likely you’ll be typing commands into the terminal window one-by-one. This is a totally valid and normal way to use PowerShell- most experienced users will do this too. You can get immediate feedback from the computer with each command you input, so you can adjust what you are doing as-you-go.
On the other hand, if you script the process… you can save yourself a-lot of time and typing; but you are ‘locked in’ to what you’ve written in the script. It is much less ‘interactive’.
We’re going to make a PowerShell-based CLI
No doubt you are familiar with ‘Command Line Interfaces’ or ‘CLI’s already; It’s the name for the kind of interface where you type commands in, rather than clicking on buttons/toggling switches/moving sliders etc. It could be said that PowerShell as a whole is its own kind of CLI. You open the window, and you type commands into it. You are interfacing with the computer by typing in lines of commands, hence the name.
You can build apps in PowerShell that have their own GUI- with clickable buttons, calendar views and dropdown menus etc… But I’m going to keep it simple with an example of how to build your own CLI-type app. I’ll also cover the absolute fundamentals of programming, so you don’t require any experience- just a little common sense.
Tools for the job I use VS Code to write my scripts. It’s a free code-editor from Microsoft that I recommend you get your hands on if you are interested programming. You know how you see programmers’ screens lined with text written in all different colours? A proper code-editor will colour your keywords, ‘lint’ your code for typos, and have all sorts of other nifty features to make reading & writing code a much more bearable experience. Also note that when you create code; the files are not unique to the program you used to make them. When we write a PowerShell script in VS Code, we’re editing the same text that can be read/written in any other text-editing program, be it MS Word, Notepad, EMACS or whatever. So yes, you could copy/paste the code direct off this blog post into Notepad, save it as whatever.ps1 and then run it as a PowerShell script. You could also open a PowerShell window and type the code directly into that if you wanted.
What our app will do
You’ll run the code and be presented with a ‘menu’. The user will be able to input a choice from the menu, and the corresponding code will be run according to that choice.
This menu will be fully extendable later, so as you learn more about PowerShell, you can keep coming back and adding to it, making your own little utility that you can run on almost any Windows computer. Building a custom ‘tool’ like this is a great way to learn PowerShell, and programming more widely.
Reading other people’s code is also a highly valuable skill, that comes with its own learning curve. I’m going to explain more or less every character in my code, which may seem a little verbose to readers who already know how to script. But I’m self taught; and nobody ever sat down explained to me to watch out for curly braces {}, what a semi-colon does ;, or why to code is formatted the way it is. I’m just trying to write the blog post that I would have found valuable when I was starting out. If you haven’t read my other ‘beginner’s-guide’ type posts, check out the one preceding this one here.
The Skeleton
Here’s the main loop we are going to build:
Do {
    Write-Host @"
[?] Display help
[Q] Quit
"@ -ForeGroundColor Cyan
    $menuChoice = Read-Host
    switch ($menuChoice) {
        '?' {
            Write-Host "Created by Barclay McClay"
            break
        }
        'q' {
            break
        }
        default {
            Write-Host "- Invalid Input -" -ForegroundColor Red
        }
    }
}Until ($menuChoice -eq 'q')
# If we've made it out of the Do{}Until() loops somehow- then exit gracefully.
Write-Host "Exiting..."
exit
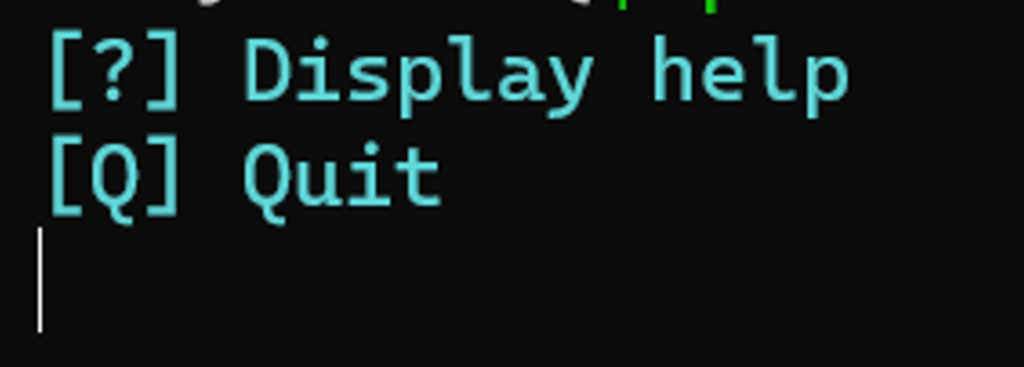
Here’s what the output looks like when it is run-
A cyan-coloured text menu with two options (”?” and “Q”). It will wait for the user to input something and press ‘enter’.
Line-by-line Breakdown
Do {
Do
A ‘keyword’ or ‘statement’. It’s saying, “I want you to do all of the stuff within the curly brackets, and keep doing all this stuff within the curly brackets, until…”Dois always paired with anUntilstatement. Keep an eye out for that later.{
The curly bracket (or ‘curly brace’) is used in PowerShell (and many other programming languages) to define ‘blocks’ (as in, ‘bricks’, ‘squares’, ‘units’) of code. Consider this: Even if you don’t know any programming languages, you could probably decipherDo x + 1 until x = 10because you are a reasonable human. The computer is not a reasonable human. The computer needs clearly defined markers to tell it “When I say this, I want you to apply it to this” with strictly NO room for ambiguity. The curly brackets (and the concept of ‘blocks’) are used to help the computer interpret what parts of the code we want our statements to apply to. In this line, we are using the curly braces withDoso,“Do {<everything within the curly braces>}”
Later in the script, we will ‘close’ this block with the closing brace
}to mark the end of theDostatement, and then we’ll have ourUntilstatement (I promiseDo{} Unitl()will be made more clear when we reach the ‘Unitl’ keyword later in the code).
Write-Host @"
This line beings with an indent (one ‘tab’ space). In PowerShell, line indents and trailing spaces do not matter like they do in some other languages. But it is good practice to use them as it helps organise your blocks of code and keep things readable. This line is in the first code block, (the
Dostatement), so it has one indent.Write-Host
Our first ‘command’, technically called a ‘cmdlet’ in PowerShell language (pronounced ‘Command-let’, as in, ‘anklet’ or ‘booklet’).Write-Hosttells the computer to output whatever text is fed to it into the terminal window. Read more in my other post here.
@"
NormallyWrite-Hostwould just write whatever comes after it on the same line. In this case, I want it to write several lines of text to the screen (to create our CLI’s ‘main menu’). I mark the text as a ‘multi-line string’ by using the@in-front of the"quote marks. We will ‘close’ the multi-line string later with"@, so in other words we tell the computer,Write @”Everything enclosed in here”@
[?] Display help
[Q] Quit
- This text is ‘wrapped’ in our
Write-Host‘s multi-line quotation markers@" "@. This means they are being ‘defined’ as a string, (we’ll cover ‘data types’ like strings and integers another time. Just know in short that a ‘string’ is text) that is getting ‘passed’ to ourWrite-Hostcommand. In other words, these lines of text are whatWrite-Hostis going to ‘write’ to the terminal window. - This is the display of the ‘main menu’ of our CLI. I want to tell the user they can input “?” to get some direction, or input “Q” to quit the app. If you want to modify the main-menu, you can make your desired changes to these lines of text.
"@ -ForeGroundColor Cyan
"@
This closes the multi-line string, ending the text that theWrite-Hostcommand will effect.-ForeGroundColor Cyan
This is our first ‘parameter’. Commands will often have parameters (marked by a-hyphen) that modify the way they behave, or give them additional required information to use. In this instance,-ForeGroundColouris an optional parameter for theWrite-Hostcommand. It is used to… you guessed it… change the colour of the text thatWrite-Hostwrites.Cyanin this case, is an ‘argument’ for the parameter. ‘Argument’ is a programmer-y term. You could think of it as an ‘input’, or a ‘parameter-for-the-parameter’. I’m sure you can figure out whatCyandoes, given the example:Write-Host "This is cyan-coloured text" -ForeGroundColor Cyan. PowerShell has several pre-set colour values. You can useRed,Green,Magenta, (and more). It’s worth noting there’s also a-BackgroundColorparameter, so you can really customise the ‘look’ of your CLI if you want to play with different colour combinations. My other blog post covers this.
$menuChoice = Read-Host
$menuChoice
This is our first ‘variable’. Variables are a common concept in all programming languages. They are a store of value. In PowerShell, they can store pretty much any value, and can be re-assigned at any time. Variables are always marked by a$in PowerShell. If I wrote$x = 1then it would be correct to say$x + 1 = 2. If I wrote$x = "Snubble Flub"thenWrite-Host $xwould write “Snubble Flub” to the window.=
Is an ‘assignment operator`. It assigns the value of whatever is on its right, to the variable on its left.Read-Host
Is another cmdlet. It waits for the user to hit the ‘enter’ key, and then ‘reads’ the value of whatever was typed before the ‘enter’ key was pressed.- So this line of code as a whole tells the computer to “store whatever the user types here as
$menuChoice”. And so subsequently, “Whenever I say$menuChoicein the code henceforth- I want you to refer to whatever the user input when we didRead-Host”.
switch ($menuChoice) {
- Here we begin our second code-block with a
switchstatement. Aswitchwill look at whatever is passed to it inside its brackets()(in this case- it’s looking at the value of$menuChoice) and will compare it to the possible values you present in its code block (note the opening{brace marking the beginning of theswitchblock).
'?' {
- Two indents at the start of this line, since it sits in our second code-block (the
switchis ‘nested’ inside of the theDo) '?'
This is the first value that ourswitchwill compare$menuChoiceagainst. In other words, if$menuChoiceis a ‘?’, then the script will execute the block of code wrapped in these curly braces. I wrap the?in single-quotes (’’) so that the computer knows this is a ‘string’ of text that I want to compare $menuChoice to.
Write-Host "Created by Barclay McClay"
- Three indents at the start of this line, as it is nested three layers deep- inside the
Doblock, theswitchblock, and the?block. We can start to see why we ‘indent’ (add those spaces) to the start of our lines of code to visually organise them into ‘blocks’. By glancing at how ‘deep’ this line of code is, we can determine that it will only be run if three pre-conditions are met- in this case, theDohas to run, we need to reach theswitch, and the switch value has to match? - This line will be executed if
$menuChoiceis equal to “?”. In other words, “If the user inputs ‘?’ at the main menu, the program will write the words ‘Created by Barclay McClay’ to the window.”
break
break
Tells the program to stop and exit the current code-block it is in. To be honest, the way I’ve used it here isn’t actually necessary in PowerShell; but it’s how you’re meant doswitchstatements in other programming languages so I’m kind-of stuck in the habit. In this case, we’re at the end of the code-block anyway, so even if thebreakwasn’t there, it’d still finish up the statement.
}
- We see the our first closing of a code block here. In this case, we are ending the
?code block within theswitchstatement. So we are done telling the computer what to do if$menuChoiceis equal to “?”.
'q' {
	break
}
- Just like the ‘?’ block above it, these lines tell the program what to do if the
switchfinds that$menuChoiceis equal to ‘q’ (the comparison is not case-sensitive, so ‘Q’ will also trigger this). - It will immediately run into a
breakand exit the code-block. This code is ‘redundant’- it doesn’t actually action anything, but it’s in there to make extending/customising this script easier down the line. - ‘Q’ is our menu option for ‘Quit’, so it’s expected that users will be commonly be inputting ‘q’ as
$menuChoice. If we wanted to display a message like “Thanks for using my App!”, or implement some sort of check such-as, ”Are you sure you want to quit?”, we could add the functionality for that here in this code-block before thebreak. - We will handle the actual ‘quitting’ of our application later-on in the code. Note this block (with nothing but a
breakstatement in it) would be executed after the user has input ‘q’, but before the app actually exits.
default {
	Write-Host "- Invalid Input -" -ForegroundColor Red
}
default {
This keyword is unique toswitchstatements. It is run if none of the other options (in this case- ‘?’ or ‘q‘ ) are found to match theswitchvalue ($menuChoice).- If the user of our app inputs anything other than one of the possible listed menu options, then the script will write a default message (
- Invalid Input -) to the terminal window, in the colourRed.
}
- There’s another closing curly brace to note here. This one closes the
switchstatement’s code block. So we’re done comparing different values to$menuChoice
} Until ($menuChoice -eq 'q')
- Here’s where it all comes together. This closing curly brace
}ends ourDostatement’s code block, which has been the entire script up to this point. Remember how I saidDois always paired with anUntil? So everything in theDoblock will keep being done, over-and-over again, Until (whatever it says in these brackets comes true) . ($menuChoice -eq 'q')
Inside theUntilbrackets, we are checking if our variable$menuChoiceis equal-eqto'q'.
# If we've made it out of the Do{}Until() loops somehow- then exit gracefully.
- This writing has a
#in-front of it. This means the PowerShell interpreter will treat it as a ‘comment’ and totally ignore whatever is written after the# - Write lots of comments all over your code. You will thank yourself later for it. This comment explains what happens after the main-loop.
Write-Host "Exiting..."
exit
- Just as the comment above it says- once the script has made it out of the
Docode-block (theUntilcondition has been resolved as ‘true’), we will write ‘Exiting…’ to the terminal window, thenexitthe app.
Summary of our Main Loop
There you have it! That’s the barebones skeletal structure of our CLI:
Do this:
Write the menu to the screen with Write-Host,
then read the user’s input with Read-Host.
Store the user’s input at the main menu in $menuChoice.
Compare $menuChoice against a list of potential options with a switch.
Keep Doing this over and over again Until the user inputs a ‘q’ (or ‘Q’) to the main menu as their $menuChoice.
If the user has input ‘q’, we finish the Do loop, write ‘Exiting…’ to the screen, and exit the app.
Where to from here?
In this post, we’ve covered some bare-bones basics, like formatting and code syntax. For now, try making changes to the code to see how it will function. Change Cyan to Green, or the "Created by Barclay McClay" message to whatever you like.
Make sure when you are experimenting that the Until condition can be fulfilled. Consider what would happen if you had something like Do { Write-Host "Hello World" } Until (1 -eq 0) .
Because 1 can never equal 0, the Until condition would never be ‘true’; and the Do loop could potentially run forever- writing “Hello World” over-and-over again, all down the screen. You will ‘trap’ yourself in the script if you do not make sure that the Until condition is possible. Press Ctrl+C to ‘keyboard interrupt’ any loops and escape situations like this.
Next, we’ll customise the application to add different menu options to the switch, and give our CLI some actual uses.
I will not be writing such detailed explanations of basic principles moving forward. See my other PowerShell posts here. My next posts on expanding the CLI will now dawdle on things like curly brackets and line indentation.
PowerShell is so widely used that most questions/issues you encounter will only be an internet search away. Now that you have some basic familiarity with what the language looks like and what different terms mean- you could try using an AI assistant to ‘tutor’ you.